Sample Explorer
Sample Explorer lets you search for tissue and blood samples of interest so that you can learn more about the samples.
The Sample Explorer window has two panes:
- Right pane
Lets you initiate a search for samples using one or more pre-defined filters. For information, see Select a Primary Search Filter, next.
After you initiate a search, the pre-defined filters are replaced by search results. For information, see View and Refine Sample Search Results.
- Left pane
- Reflects the currently selected filters and the number of a filter’s samples that appear in the search results.
Select a Primary Search Filter
This pane of the Sample Explorer window lets you initiate a search for samples by selecting the primary search filter. The primary search filters appear when you first open Sample Explorer, or, after you have begun a search, when you click Clear Search in the upper-left corner of the pane.
Click a filter to initiate a sample search.
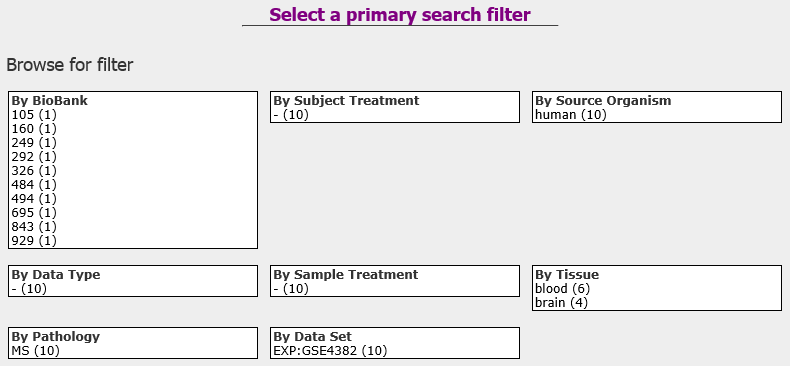
Note that the number of samples that are associated with a filter appear in parentheses after the filter name.
View and Refine Sample Search Results
After you select a Select a Primary Search Filter:
- The right pane displays the search results.
- The left pane contains all selected and de-selected search filters, allowing you to narrow the search results.
The following figure illustrates the sections of the Sample Explorer after a primary search filter has been selected:
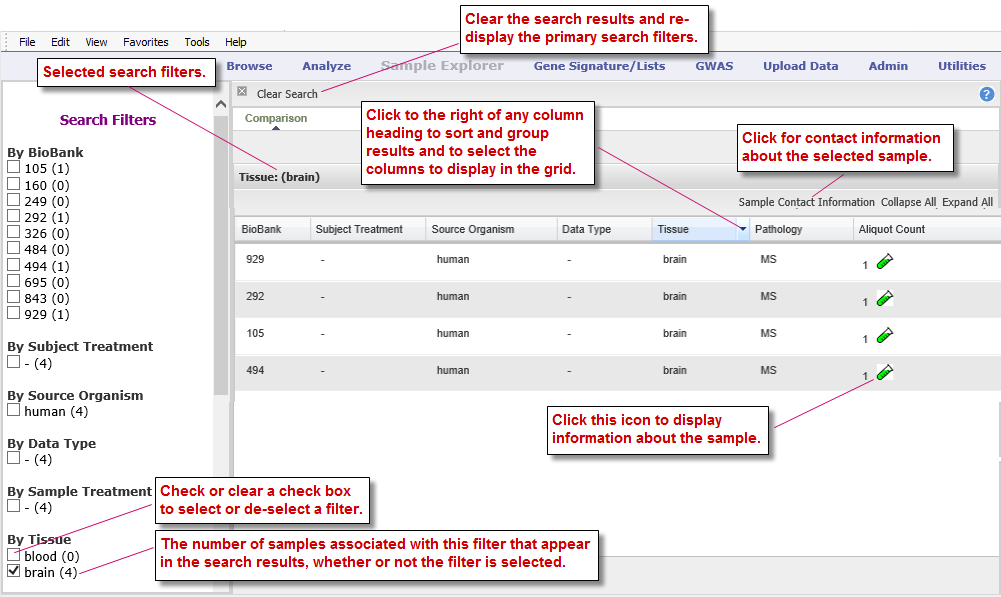
Tasks you can perform in the Sample Explorer window include:
- Select and Remove Search Filters
- Sort and group the search results, and add/remove search result columns: Manage the Search Result List
Select and Remove Search Filters
You can refine a sample search result by adding and removing search filters, including the primary filter you initially selected. Search filters are listed in the left pane of the Sample Explorer window.
To select or remove a search filter, check or clear the check box next to the filter name.
Note
Clicking a filter name rather than the check box next to the name will select that filter and deselect all currently selected filters.
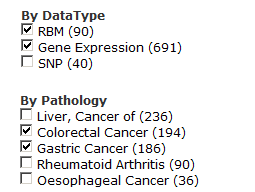
The filters you select are joined together in a search string by the logical operators AND and OR, as follows:
Filters within a filter category (such as DataType) are joined by OR.
Filters in different filter categories are joined by AND.
For example, the search string for the filter selections illustrated below is:
(RBM OR Gene Expression) AND (Colorectal Cancer OR Gastric Cancer)
Manage the Search Result List
You can make the following adjustments to the search result list:
Sort by Column
To sort the result list by the contents of a column:
Click the right side of the column heading to pull down the menu:
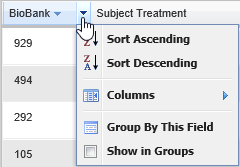
Click Sort Ascending or Sort Descending.
Add and Remove Columns
To add and remove columns:
Click the right side of the column header to pull down the menu.
Hover the mouse pointer over Columns to display the submenu of column headings:
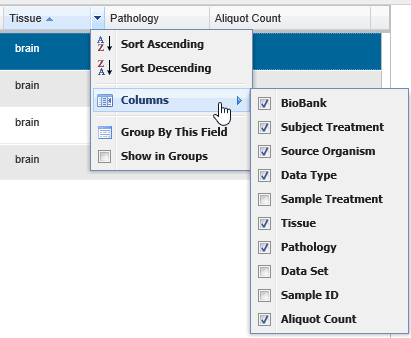
Check or clear the check boxes to add or remove columns from the search result.
Note
If the columns bunch together, slightly drag the right edge of the frame around one of the column headings.
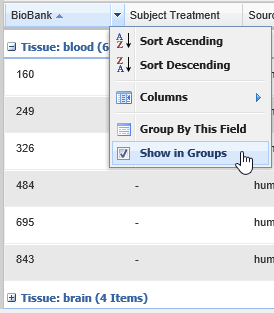
Group and Ungroup Search Results
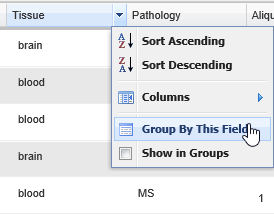
To group search results by the contents of a particular column:
Click the right side of the column header to pull down the menu.
Click Group by This Field.
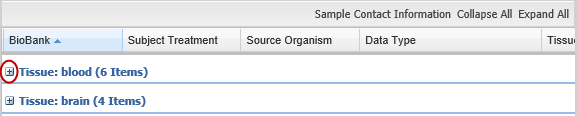
To view the samples in all groups click Expand All in the upper-right corner of the search result.
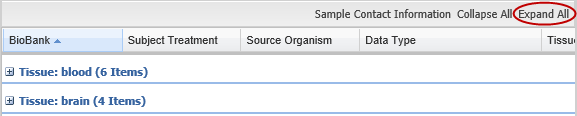
To view the samples in a particular group click the plus-sign icon next to the group name:
To ungroup the search result pull down the menu and click the Show in Groups menu item: